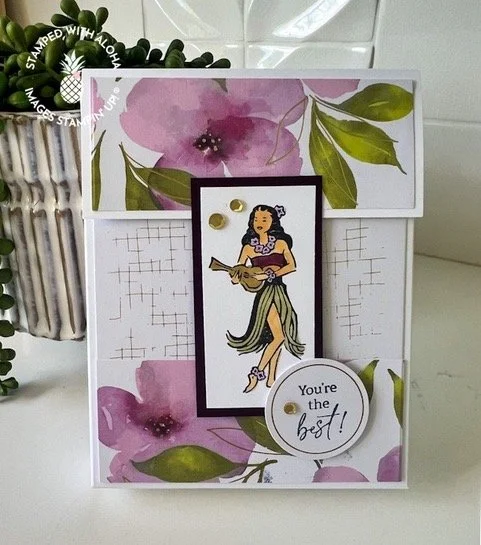
Garden Of Thanks DIY Box: Store 4 Cards & Envelopes
Are you looking to add a touch of elegance to your handmade thank-you cards? This coordinating gift box is the perfect finishing touch. Using pieces from the Garden of Thanks Kit, you can create a beautifully decorated box to hold your cards and envelopes. It's a wonderful way to showcase your crafting skills and make your gifts even more special
GARDEN OF THANKS DIY BOX Stores 4 Cards & Coordinating Envelopes
For a hands-on demonstration, check out the video tutorial
To get started, you’ll want to buy the Garden of Thanks Kit (Item #164398). To read the details of the kit, make sure you check out the featured post and then come back here to see the 4 added designs I created. Adding just a little bit of extra cardstock you can really stretch your kit contents to make so many more cards!
DIY BOX TO STORE YOUR CARDS
Box
Take a 12” X 12” piece of white cardstock and cut it down to 12” x 7”
For the box flap, take the 5” x 12” piece and cut that down to 4-1/2” x 5-1/2”. On the 5-1/2” side score at 2” and 3”
For the box, take the 12” x 7” piece, lay the 12” side down onto the paper trimmer, and score at 1”, 5-1/2”, 6-1/2”, and 11” Turn the cardstock and score at 1”.
Below the 1” score lines, cut the flaps as demonstrated on the video and then fold and glue as shown.
Now that the base of the box has been shown, you can make the flap.
Take the flap piece and score, fold, and glue as demonstrated.
Attach decorative pieces onto the box
Take the stamped focal image, cut a mat in a coordinating color - I used Blackberry Bliss cardstock. Use dimensionals to adhere the focal point making sure you leave enough room at the top to tuck the flap behind the stamped image so the box will close.
Stamp and attach the sentiment
Add sequins
With love and blessings,
Cindy


